ESP32 S3 - Voice-Satellite
ESP32-S3 WROOM-1-N16-R8 — Home Assistant Voice Assistant
Wie angekündigt, gibt es hier meinen Ersatz für den Atom Echo als Home Assistant – Voice Assistant.
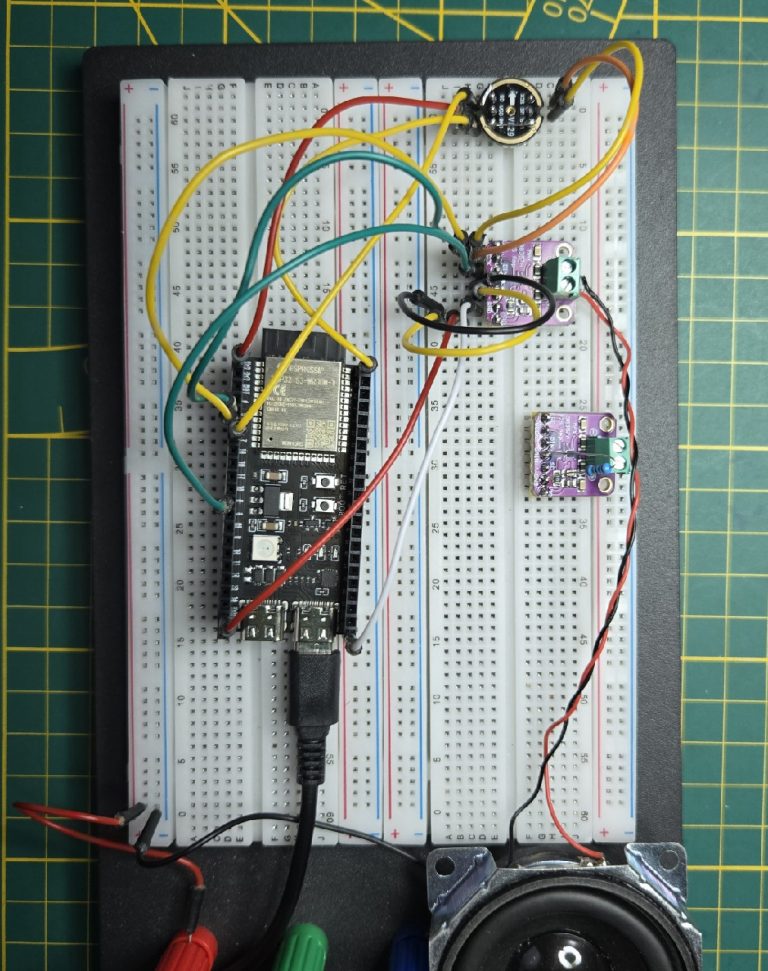
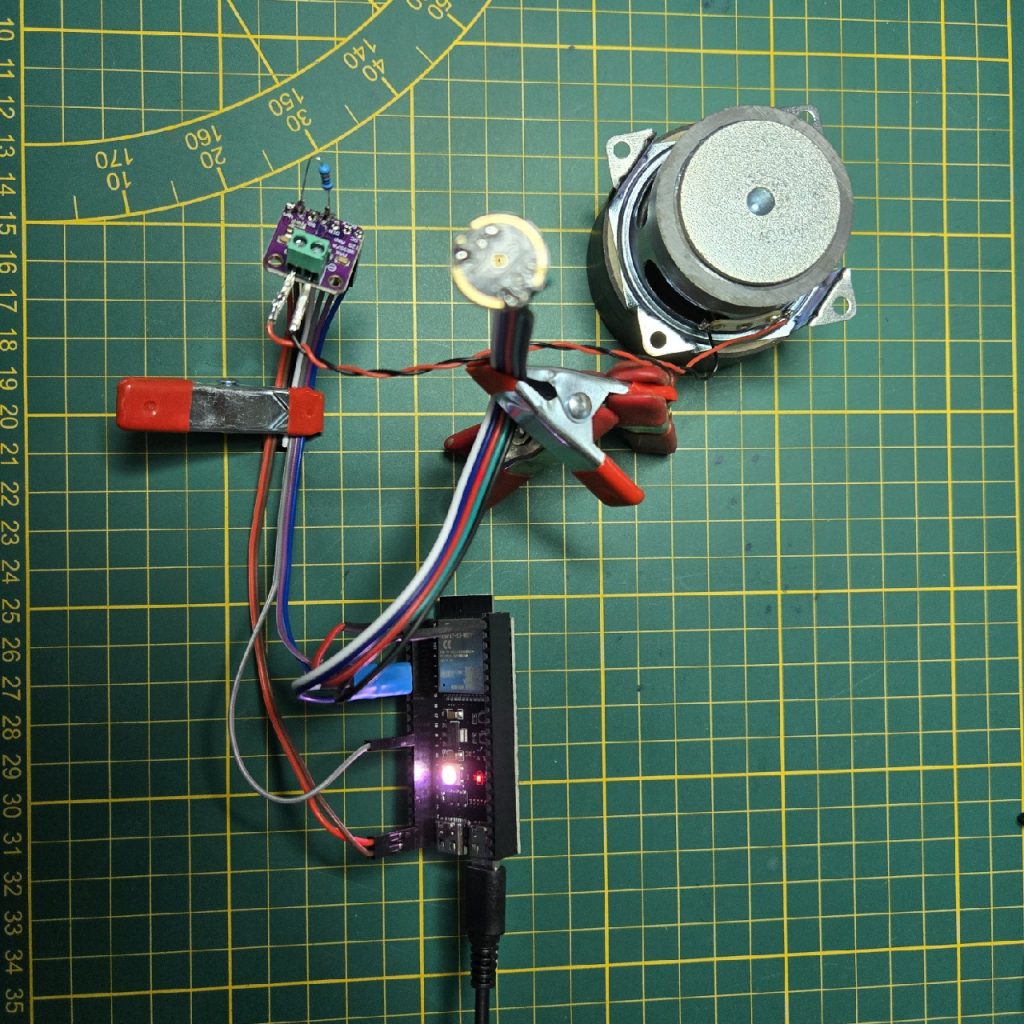
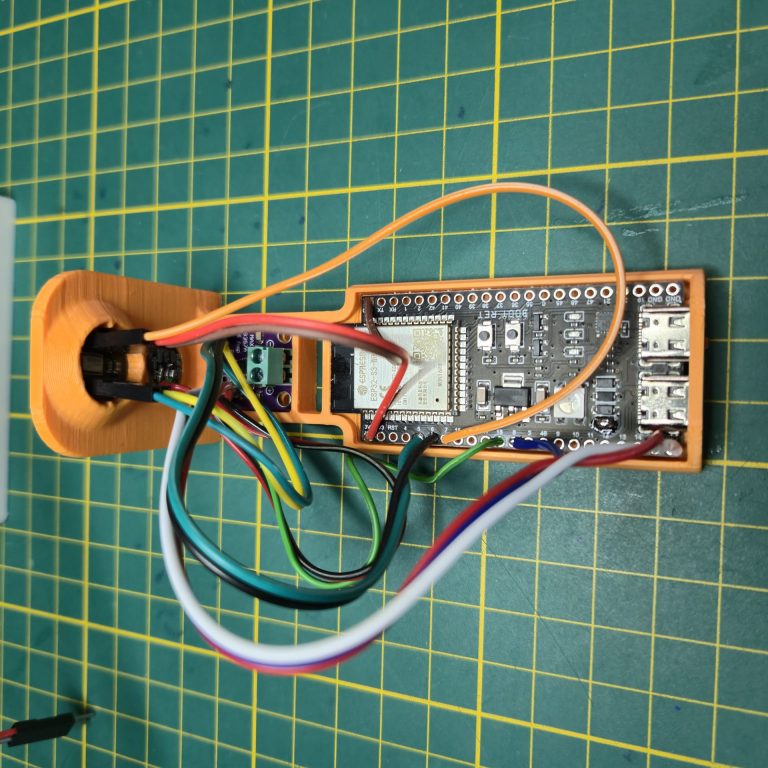
Das Bildmaterial zeigt einige ausgewählte Aufnahmen aus meinem Entwicklungsprozess, damit ihr den Aufbau einfacher nachvollziehen könnt. Begonnen habe ich mit der ersten Zusammenstellung und natürlich auf einem Breadboard und bin dann dazu übergegangen, die Kabel direkt anzulöten, da die Verbindung so stabiler ist und weniger Störanfällig. Da aber die Austauschbarkeit der Baugruppen im Fehlerfall unter dieser Vorgehensweise leidet, habe ich bei mir “Ali“ zwei Sorten Stecher und Verbinder bestellt die ich nun stattdessen verwende. So kann ich später nach belieben fehlerhafte Elemente einfach austauschen. Ich nutze ein Paar Verbinder mit zwei Kabeln für die Spannungsversorgung und ein Paar Verbinder mit drei Kabeln, da ich so alles leicht abdecken kann.
In der Regel sind zum Anschluss der Baugruppen immer 5 Kabel nötig:
Tx, Rx, GPIO, 5V+/3V+ & GND
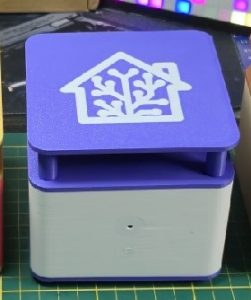
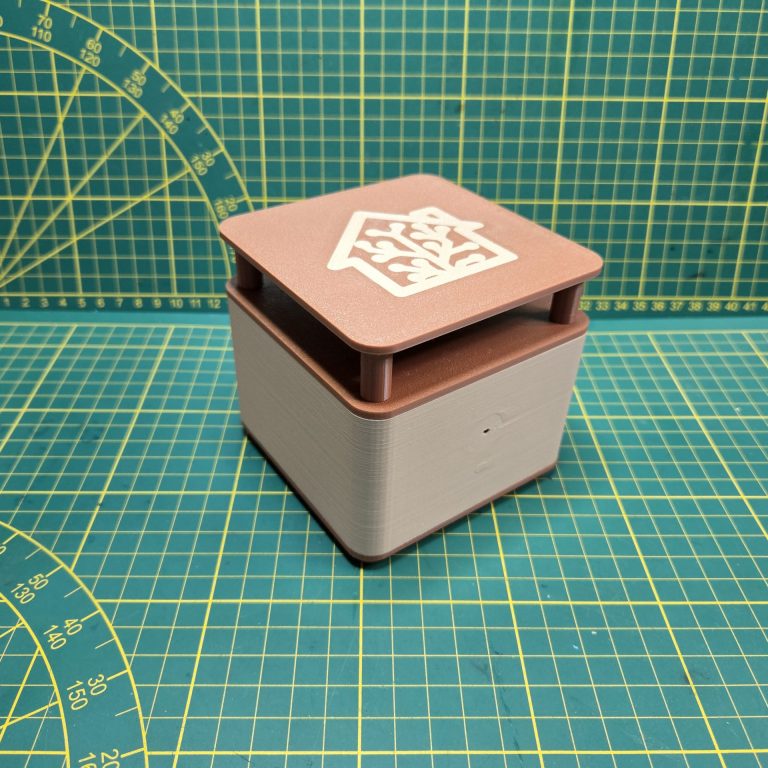
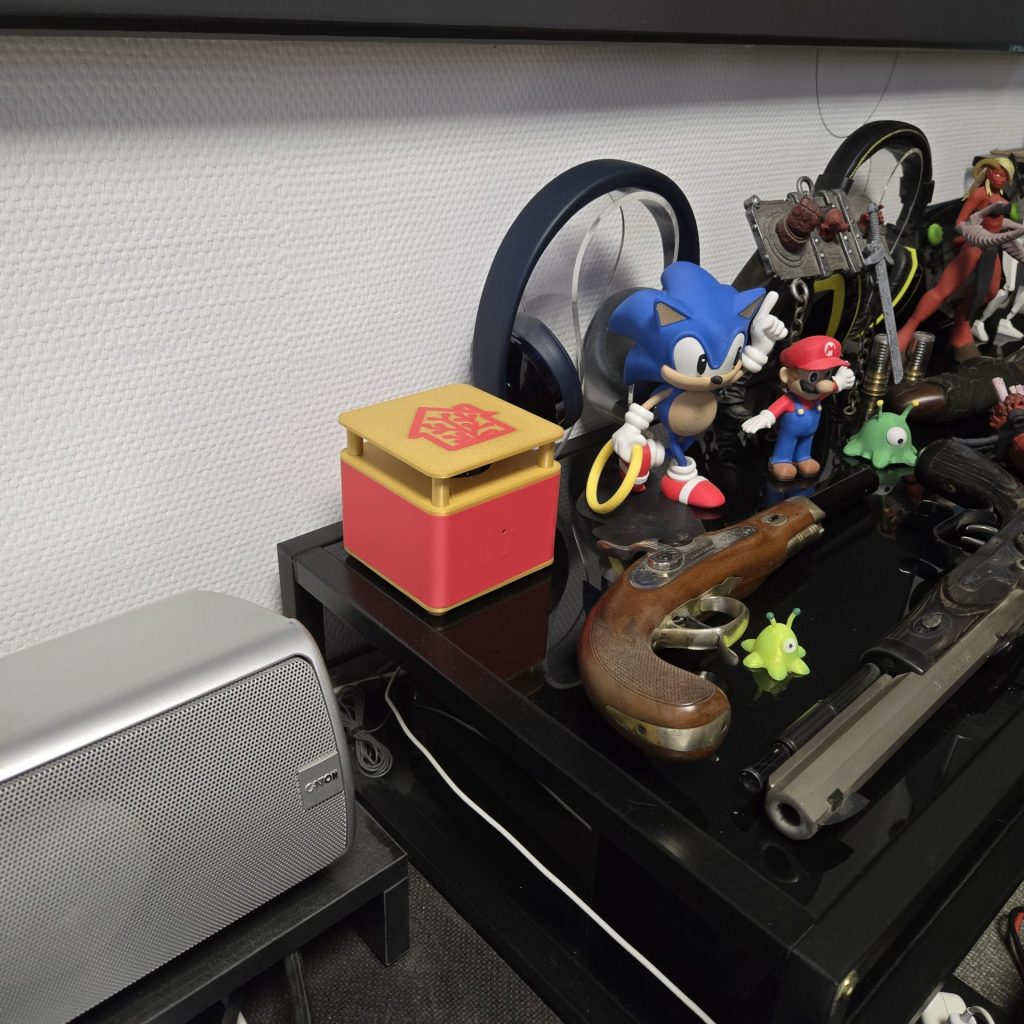
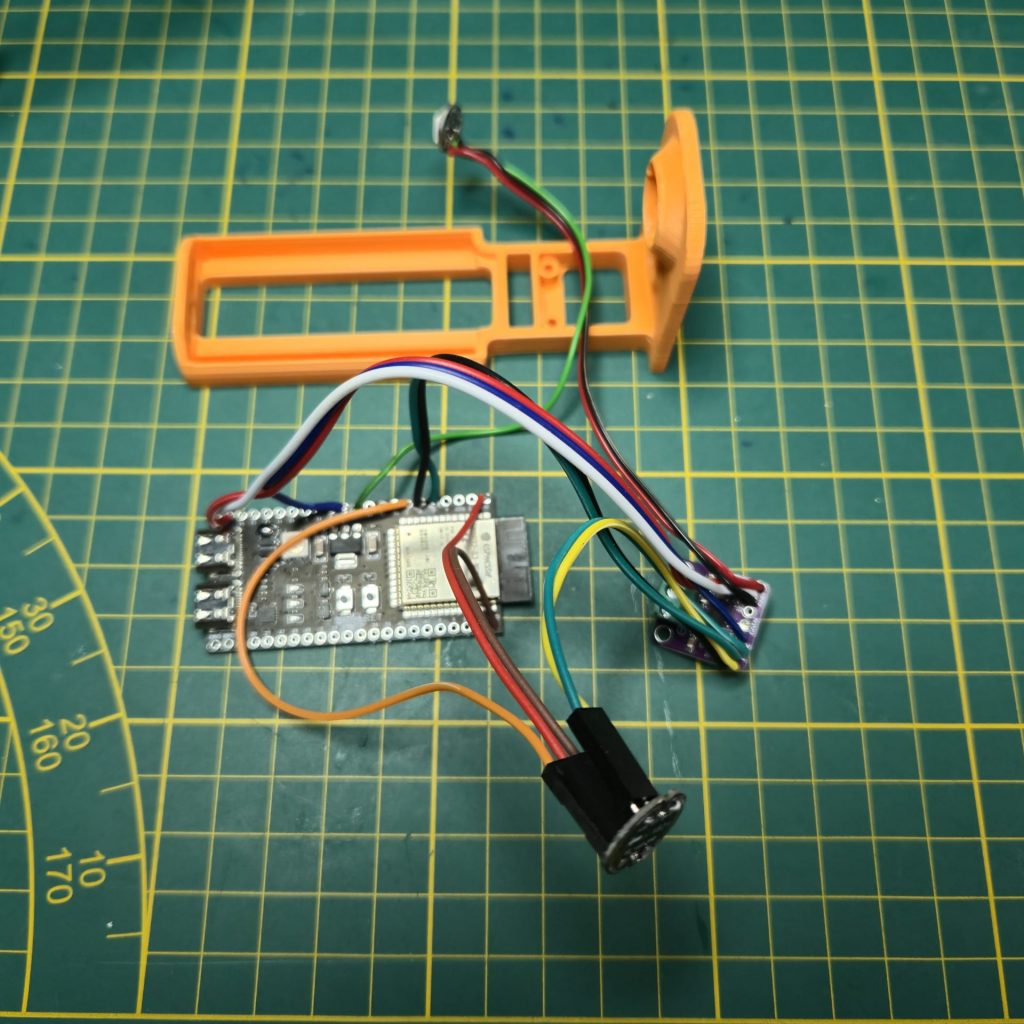
Um das Ganze dann in ein 3D gedrucktes Gehäuse zu verpacken, habe ich mir vorher eine Art Schablone gebaut, in die alles zum Testen eingepasst werden kann. Leider sind die Platinen der elektronischen Bauteile fast immer mit irgendwelchen Nasen und Kanten aus der Produktion versehen, die man vorsichtig abfeilen sollte. Ich verwende hierzu eine kleine Schlüsselpfeile, aber auch eine Nagelfeile oder etwas Vergleichbares würde dafür ausreichen. Wenn dann alles in die Schablone passt, kann man damit beginnen, die Bauteile in das fertig gedruckte Gehäuse einzusetzen.
Die Liste der Komponenten ist bewusst sehr einfach und preiswert gehalten.
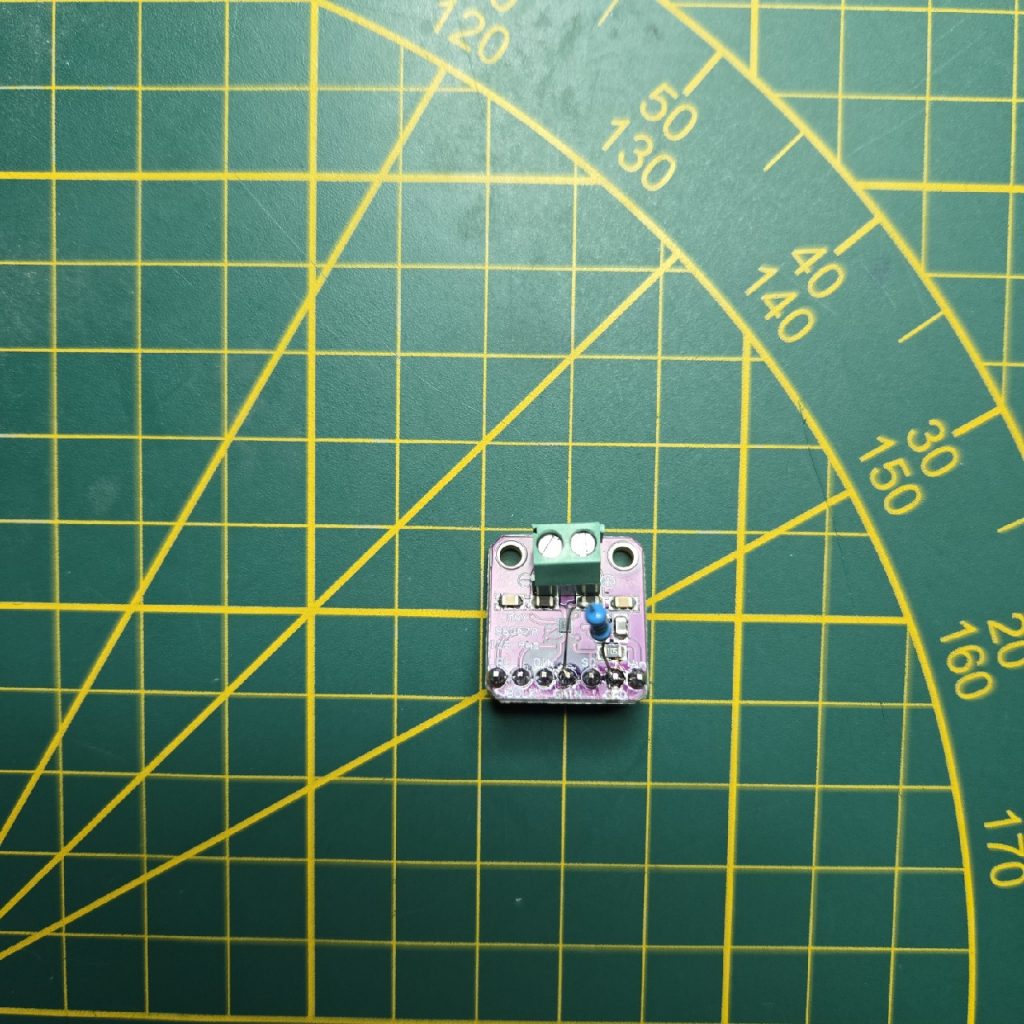
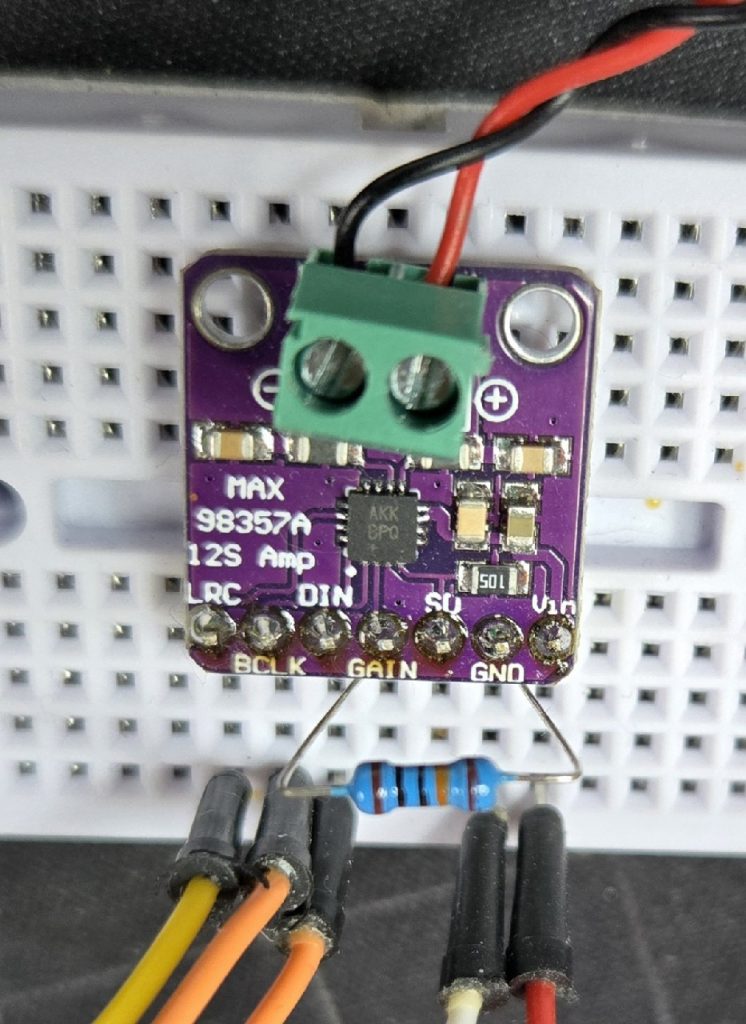
Ich verwende die üblichen Verdächtigen einen Max98357A als Verstärker und ein INMP441 als Mikrofon. Die LED ist eine Adressierbare WS2812 mit 5 Volt und als Lautsprecher verwende ich einen Aiyima 2,5“, 4 Ohm, 3 Watt, welche ich normalerweise gerne empfehlen würde, aber da meine letzten Lieferungen nur Schrott waren, rate ich eher zu einer Alternative von einem anderen Hersteller.
Um das Kratzen im Lautsprecher beim Booten durch den freischwingenden Max98357A zu eliminieren, verwende ich einfach 2 Wave Dateien bei der Initialisierung und vermeide dadurch sämtliche Störgeräusche.
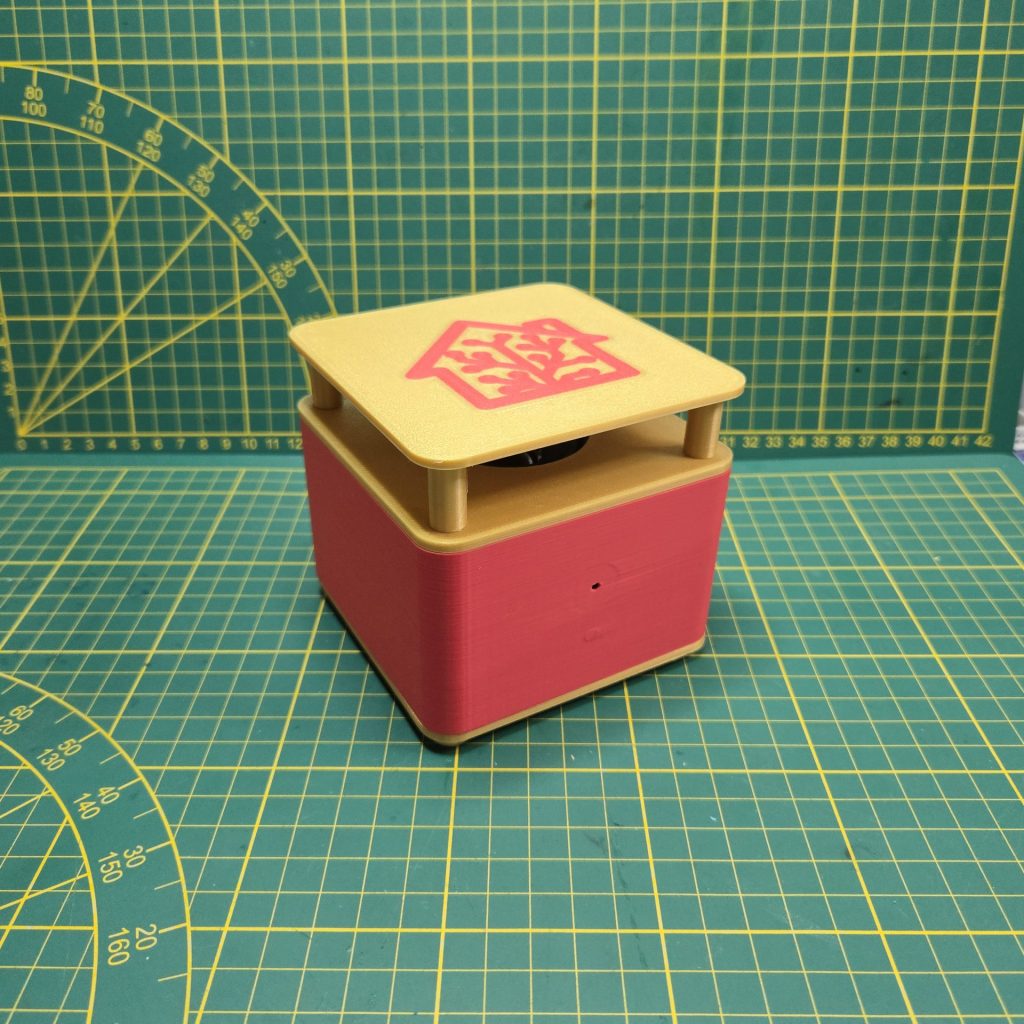
Wenn man für das Gehäuse den Bambu Slicer verwendet, sollte man unbedingt darauf achten, dass die Option “dünne Wände erkennen“ ausgeschaltet ist. Bei mir hat diese zu deutlichen Fehlern in der Oberfläche im Bereich Mikrofon und LED geführt…
Und fertig ist der beste Voice Assistant für Home Assistant, was Preis und Leistung angeht. Gemessen an vergleichbaren Assistenten komme ich auf ein Preisverhältnis von etwa 4 zu 1 !!!
Im nächsten Projekt stelle ich Euch dann meine Pro Version dieses Voice Assistant vor. Sie ist etwas komplizierter aber meine Empfehlung, wenn ihr wie ich den “Ultimativen Home Assistant – Voice Assistant“ haben wollt der die anderen hinter sich lässt und das nicht nur beim Preis…
Baukosten ohne den 3D Druck: ca. 20€
Geschätzter Marktwert für den fertigen Voice Assistant: 60-100 Euro
Home Assistant Voice Assistant Build Guide
As announced, here is my replacement for the Atom Echo as a Home Assistant voice assistant. The images show some selected shots from my development process to help you easily understand the build. I started with the initial assembly on a breadboard, of course, and then switched to soldering the cables directly because the connection is more stable and less prone to interference. However, since this approach makes it difficult to replace components in case of a failure, I’ve ordered two types of plugs and connectors from ‚Ali‘ (Aliexpress) that I now use instead. This way, I can easily swap out any faulty elements later on. I use a pair of two-pin connectors for the power supply and a pair of three-pin connectors to easily cover all connections.
In general, connecting the modules always requires five cables: Tx, Rx, GPIO, 5V+/3V+, and GND.
To then put everything into a 3D-printed case, I first built a type of template into which everything can be fitted for testing. Unfortunately, the circuit boards of the electronic components are almost always produced with small nubs and edges that you should carefully file off. I use a small key file for this, but a nail file or something similar would also be sufficient. Once everything fits into the template, you can start inserting the components into the finished printed case.
The component list is deliberately kept very simple and inexpensive. I use the usual suspects: a Max98357A as the amplifier and an INMP441 as the microphone. The LED is an addressable WS2812 with 5 volts, and for the speaker, I use an Aiyima 2.5″, 4 Ohm, 3 Watt, which I would normally recommend. However, since my last deliveries were garbage, I’d suggest an alternative from a different manufacturer.
To eliminate the scratching noise in the speaker during boot-up caused by the free-floating Max98357A, I simply use two wave files during initialization, which prevents all interference.
If you are using the Bambu Slicer for the case, you should definitely make sure the „detect thin walls“ option is turned off. For me, this resulted in significant surface errors in the microphone and LED areas.
And just like that, you have the best voice assistant for Home Assistant in terms of price and performance. Compared to similar assistants, I get a price ratio of about 4 to 1!
In the next project, I will introduce my pro version of this voice assistant. It’s a bit more complicated but is my recommendation if you, like me, want the „Ultimate Home Assistant Voice Assistant“ that leaves the others behind, and not just in terms of price…
Construction costs without the 3D print: approx. 20€
Estimated market value for the finished voice assistant: 60-100 Euro
# GGFW – ESP32S3-VAxx – Ver 5.0 – Final – external LED
# ESP32-S3 DevKitC-1 – Pinout für Voice Assistant mit ext. LED
################################################################
# GPIO5 -> MAX98357A (BCLK) & INMP441 (SCK)
# GPIO6 -> MAX98357A (LRC) & INMP441 (WS)
# GPIO7 -> INMP441 (SD)
# GPIO8 -> MAX98357A (DIN)
# GPIO18 -> external LED
# INMP441 VCD -> 3,3Volt
# INMP441 GND -> GND
# INMP441 L/R -> GND
# MAX98357A Vin -> 5Volt
# MAX98357A GND -> GND
# MAX98357A SD -> left open (or GND)
# MAX98357A Gain -> 300 Ohm to GND for 12dB (open 9 dB)
################################################################
Ich habe trotz allem die Firmware für meine VA‘s etwas verbessert und auf den ESP Versionswechsel vorbereitet, – Stichwort Wegfall von “State“. Weil ich aber für jeden VA im Netz immer erst eine eigene Konfiguration erstellen muss, habe ich jetzt extra dafür ein eigenes Programm geschrieben, um das erheblich zu beschleunigen.
Hier gibt es jetzt auch die Videos zu diesem Build...